I. Introduction
1.1 Technological Background and Significance
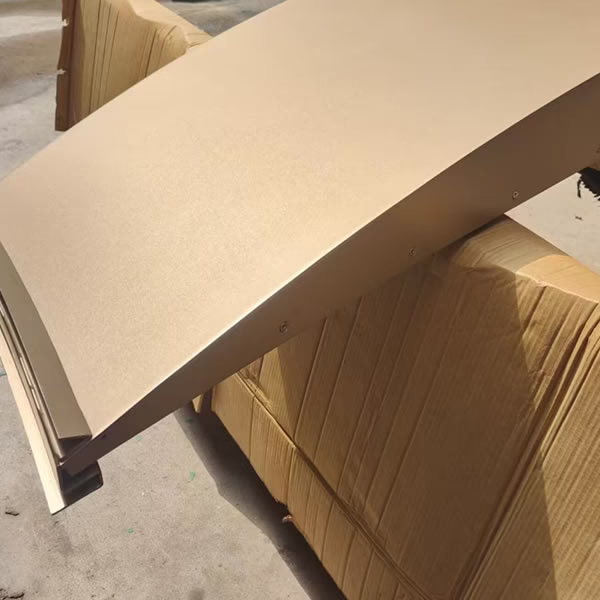
Aluminum panel curtain walls have emerged as a cornerstone of modern architectural design, blending aesthetic appeal with structural integrity. Their lightweight yet robust composition makes them ideal for cladding high-rise buildings, corporate facades, and institutional structures. The inherent durability of aluminum—resistant to corrosion, UV degradation, and extreme temperatures—ensures long-term performance in diverse climates. Equally critical is their adaptability to innovative architectural forms, enabling the realization of complex geometries and seamless facades that define contemporary urban landscapes.

Central to the functionality of aluminum curtain walls is the sealant application process, commonly referred to as “caulking.” This seemingly minor step is pivotal in bridging gaps between panels, anchoring points, and structural joints. Beyond mere aesthetics, proper sealant application acts as the first line of defense against environmental stressors—water infiltration, air leakage, and thermal bridging. In regions prone to hurricanes or seismic activity, the adhesive properties of sealants contribute to the system’s structural stability, preventing panel dislodgement under extreme loads.
1.2 Process Objectives and Requirements
The primary objective of aluminum panel caulking is to achieve triple redundancy:
- Structural Sealing: Ensure load-bearing joints maintain integrity under wind, gravity, and thermal expansion/contraction cycles.
- Waterproofing: Create a continuous barrier against rainwater ingress, complying with ASTM E2112 and AAMA 501.1 standards for water penetration resistance.
- Aesthetic Uniformity: Deliver flawless surface finishes that align with architectural design intent, minimizing visible defects such as bubbling, cracking, or discoloration over the lifespan of the building.
Secondary requirements include compliance with local building codes (e.g., Miami-Dade NOA for high-velocity hurricane zones), optimization of sealant viscosity for substrate adhesion, and selection of UV-stable formulations to prevent premature weathering in sun-intensive regions.
II. Technical Rationale for Sealant Density Optimization
The term “density” in caulking refers not to material thickness but to the precision of application—achieving consistent bead geometry, void-free adhesion, and uniform cure rates. High-density sealant application minimizes micro-channels that could compromise waterproofing. This is particularly critical in aluminum systems where thermal movement (up to ±3mm/m per 50°C temperature shift) stresses joints cyclically.
2.1 Material Science Considerations
Modern sealants (e.g., silicone, polyurethane, or hybrid polymers) are engineered with:
- Elastomeric properties: Maintaining 20-50% elongation at break to accommodate movement
- Adhesion promoters: Enhancing bond strength to anodized/painted aluminum surfaces
- Fungicidal additives: Preventing mold growth in humid environments
- Thermal stability: Retaining flexibility across -40°C to +80°C temperature ranges
2.2 Application Parameters
To achieve optimal sealant density:
- Bead geometry: Maintain a width-to-depth ratio of 2:1 (e.g., 6mm wide × 3mm deep)
- Tooling techniques: Use concave spatulas to force sealant into joint irregularities
- Cure control: Apply primer-less sealants only when surface temperatures exceed 5°C and humidity remains below 85%
- Quality assurance: Conduct peel adhesion tests (ASTM C794) and dye penetration inspections post-installation
III. Field Implementation Strategies
3.1 Pre-Application Protocols
- Joint preparation: Clean substrates with isopropyl alcohol to remove silicone contaminants
- Backer rod installation: Use closed-cell foam rods compressed 25% to control sealant depth
- Masking techniques: Apply painter’s tape 3mm from joint edges to ensure crisp lines
3.2 Application Best Practices
- Dual-component systems: Utilize meter-mix equipment for 1:1 ratio accuracy in two-part sealants
- Robotic application: Employ automated caulking robots for high-rise projects to maintain consistent bead profiles
- Environmental monitoring: Log temperature/humidity during application using IoT sensors
3.3 Post-Application Validation
- Visual inspection: Check for continuous wetting along joint perimeters (indicative of proper adhesion)
- Non-destructive testing: Use ultrasonic thickness gauges to verify sealant depth
- Accelerated weathering: Subject test panels to 1000-hour QUV exposure cycles to simulate 5-year aging

IV. Sustainability and Future Trends
The industry is evolving toward bio-based sealants derived from renewable feedstocks, reducing carbon footprints by 30-40% compared to petroleum-based products. Additionally, self-healing sealants incorporating microcapsules release curative agents when cracks form, extending maintenance cycles. Building Information Modeling (BIM) now integrates caulking parameters into digital twins, enabling predictive maintenance through real-time joint stress analysis.
I. Types and Performance Analysis of Sealants
A. Silicone Sealants
Silicone sealants are renowned for their exceptional durability and versatility. They offer superb resistance to extreme temperatures, UV radiation, and moisture, making them ideal for outdoor applications. Key characteristics include:
- Weatherability: Excellent, withstands harsh weather conditions without cracking or degrading.
- Adhesion: Strong adhesion to a wide range of substrates, including glass, metal, and plastics.
- Elasticity: High elasticity allows for significant movement and expansion/contraction of joints.
- Environmental Performance: Generally inert and non-toxic, but some formulations may contain solvents that require proper ventilation during application.
B. Acrylic Sealants
Acrylic sealants are known for their fast curing time and good paintability. They are often used in interior applications where quick set times are beneficial. Their properties include:
- Weatherability: Moderate, suitable for mild to moderate weather conditions. Prolonged exposure to UV light may lead to discoloration.
- Adhesion: Good adhesion to many common building materials, but may not bond as strongly to some plastics or oily surfaces.
- Elasticity: Moderate elasticity, capable of accommodating minor joint movements.
- Environmental Performance: Typically low in VOCs (Volatile Organic Compounds), making them a more environmentally friendly option compared to some other sealants.
C. Polyurethane Sealants
Polyurethane sealants are highly versatile and offer excellent adhesion and flexibility. They are often used in applications requiring high tensile strength and abrasion resistance. Their features include:
- Weatherability: Very good, resistant to UV light, moisture, and temperature extremes.
- Adhesion: Exceptional adhesion to a broad spectrum of substrates, including concrete, metal, and wood.
- Elasticity: High elasticity, allowing for significant joint movement and vibration absorption.
- Environmental Performance: Some polyurethane sealants may contain isocyanates, which can be harmful if not handled properly. It is essential to follow manufacturer’s guidelines for safe application.
II. Auxiliary Materials and Tools
A. Tool Selection
- Caulking Guns: Choose a caulking gun that is comfortable to hold and easy to operate. Pneumatic guns offer faster application for large projects, while manual guns are suitable for smaller jobs.
- Scrapers and Spatulas: Use these tools to remove old sealant, smooth out new applications, and ensure a neat finish.
- Application Templates: Templates help in maintaining consistent bead size and shape, especially in areas requiring precise application.
B. Substrate Preparation
Proper substrate preparation is critical for achieving optimal adhesion and sealant performance. This involves:
- Cleaning: Use appropriate cleaners to remove dirt, grease, and other contaminants from the surface. For aluminum panels, a mild detergent or alcohol-based cleaner is usually sufficient.
- Primers: In some cases, a primer may be necessary to enhance adhesion, particularly when sealing to non-porous or difficult-to-bond surfaces.
- Masking Tape: Apply masking tape along the edges of the joint to ensure clean lines and prevent sealant smearing on adjacent surfaces.
III. Aluminum Panel Sealing Density
When sealing aluminum panels, achieving the correct density is essential for both performance and aesthetics. Here are some tips to ensure proper sealing density:
- Joint Design: Ensure that joints are properly designed to accommodate the expected movement and provide adequate space for the sealant.
- Bead Size: Apply a consistent bead size that matches the joint width. For aluminum panels, a bead width of approximately 1/4 to 3/8 inch is typically recommended.
- Tooling: Use a spatula or similar tool to smooth out the sealant and ensure proper contact with both surfaces of the joint. This helps in achieving the desired density and prevents air pockets.
- Curing Time: Allow sufficient time for the sealant to cure before exposing it to moisture or other environmental factors. Follow the manufacturer’s recommendations for curing times.
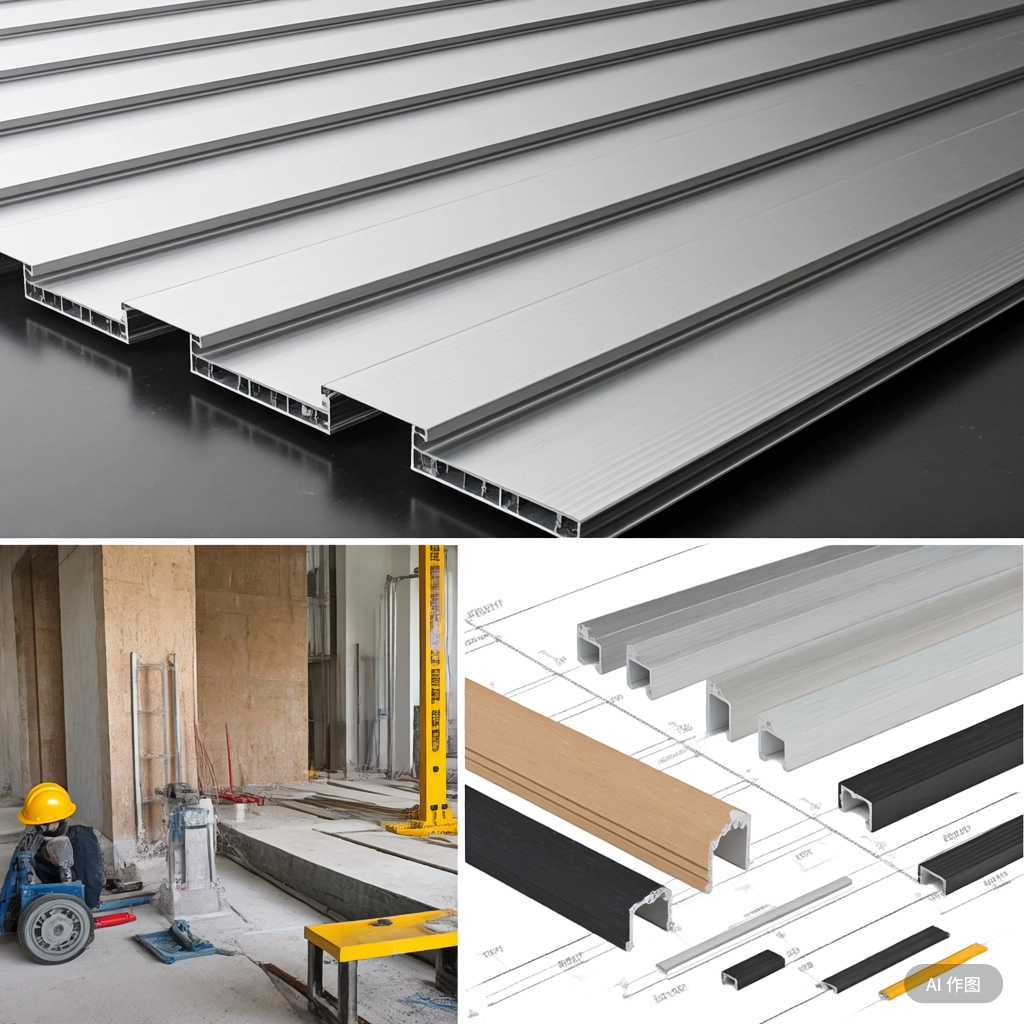
Pre-Construction Preparation Guide for Aluminum Panel Installation

1. Construction Site Inspection
Prior to commencement, conduct a thorough inspection of the worksite to identify potential hazards, structural integrity, and accessibility. Verify that the site meets all safety standards (e.g., fire exits, emergency lighting) and ensure proper ventilation for adhesive application. Document site conditions, including lighting, power availability, and storage spaces for materials.
2. Environmental Conditions & Cleanliness Requirements
- Temperature & Humidity: Maintain ambient temperatures between 15°C–30°C (59°F–86°F) and humidity below 75% during adhesive application to ensure proper curing.
- Cleanliness: The work area must be free of dust, debris, and contaminants. Use HEPA-filtered vacuums and tack cloths to clean surfaces before sealing.
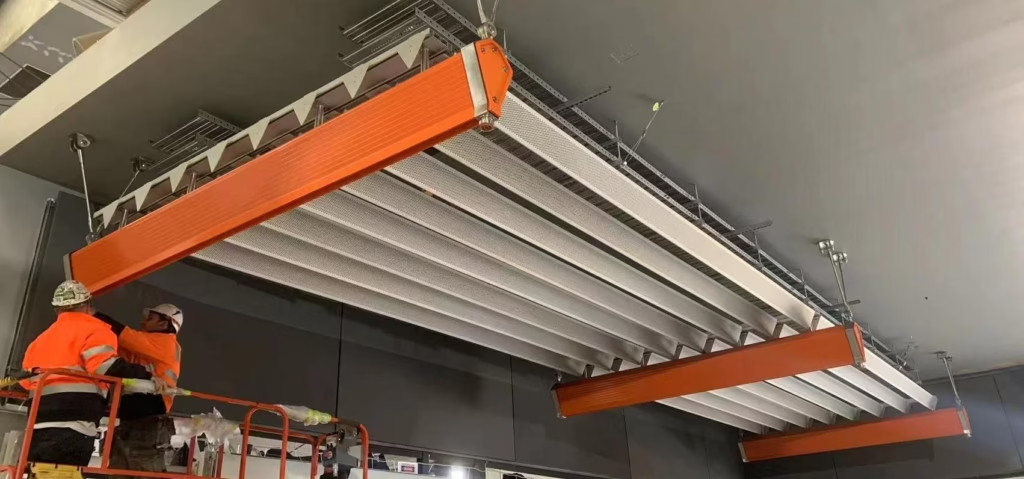
3. Safety Measures & High-Altitude Work Protocols
- PPE: Enforce mandatory use of hard hats, safety glasses, gloves, and fall-arrest harnesses for elevated work.
- Scaffolding: Erect OSHA-compliant scaffolding with guardrails and toe boards. Conduct daily inspections of rigging and anchor points.
- Emergency Plan: Establish clear evacuation routes and first-aid stations. Train workers on fire suppression and emergency response protocols.
4. Substrate Preparation & Pre-Inspection
- Surface Cleaning: Degrease aluminum panels using isopropyl alcohol or approved solvents. Remove rust with abrasive pads (grit P120–P240) followed by acid etching (e.g., 10% phosphoric acid solution).
- Pre-Treatment: Apply a chromate-free conversion coating to enhance adhesive bonding. Ensure surfaces are dry (≤5% moisture content) using a hygrometer.
5. Aluminum Panel Sealing: Adhesive Density Optimization
- Joint Design: Use backing rods to maintain consistent joint widths (typically 6–12mm). Apply sealant at a 45° angle to avoid air pockets.
- Density Control: Achieve a minimum adhesive density of 1.2–1.5kg/m³ by applying continuous beads under steady pressure. Use a notched trowel for uniform thickness.
- Curing: Allow sealants to cure at controlled temperatures. Test adhesion with a cross-hatch cutter after 72 hours (ASTM D3359 standard).
6. Pre-Testing & Sample Mockups
- Adhesive Trials: Conduct pull-off tests (ASTM D4541) on sample panels to validate bond strength (≥1.5MPa).
- Weather Simulation: Expose test samples to UV chambers and thermal cycling (-30°C to 70°C) to simulate 5-year aging.
7. Construction Plan & Process Workflow
- Phased Approach: Divide the project into zones (e.g., façades, roofs) with dedicated teams. Sequence tasks as: Phase 1: Substrate prep → Phase 2: Sealant application → Phase 3: Panel installation → Phase 4: Quality inspection.
- Material Logistics: Store sealants in climate-controlled areas (10°C–25°C) and rotate stock using FIFO principles.
8. Work Sequence Coordination
- Interface Management: Coordinate with MEP (mechanical-electrical-plumbing) contractors to avoid sealant damage during post-installation drilling.
- Touch-Up Protocol: Schedule daily inspections to repair imperfect joints within the 24-hour open time of the adhesive.
9. Technician Training & Skill Development
- Certification: Require workers to complete SSPC-SP1 (Solvent Cleaning) and SPC-2 (Hand Tool Cleaning) training.
- Practical Drills: Conduct mock installations on scrap panels to enforce proper gunning techniques and waste minimization.
- Quality Circles: Host weekly reviews of adhesive application videos to identify and rectify technique inconsistencies.
10. Documentation & Compliance
- Maintain daily logs of environmental conditions, adhesive batch numbers, and test results.
- Generate a final QA report with infrared thermography images of sealed joints to confirm continuity.
Detailed Sealing Process for Aluminum Panel Installation
1. Joint Design & Layout Planning
- Positioning: Align joints perpendicular to gravity to prevent sagging. Use laser levels and digital templates for precision (±1mm tolerance).
- Pattern Optimization: Stagger horizontal joints across floors to avoid continuous lines. Maintain ≥20mm distance from panel edges to prevent stress concentration.
2. Joint Dimension Specifications
- Width: Design joints between 8–15mm based on panel thickness and movement expectations. Narrow joints (8–10mm) reduce material use but require precise application.
- Depth: Ensure ≥5mm depth using foam backer rods. Compress rods 10%–15% to create hourglass-shaped reservoirs for sealant adhesion.
3. Critical Node Treatment
- Corners: Pre-fit external corner molds with removable tape to create crisp 90° angles. Apply sealant in two passes: first along the vertical leg, then the horizontal.
- Interfaces: At T-joints between walls and roofs, use flexible hybrid sealants (e.g., silicone-modified polyurethanes) to accommodate differential movement.
- Edges: Protect exposed edges with peel-away tape, leaving 2mm gaps to avoid sealant smearing.
4. Sealant Application Techniques
- Material Selection: Use high-density, low-modulus sealants (e.g., DOWSIL 791) with elongation ≥300% to ensure flexibility.
- Dual-Component Systems: For accelerated curing, mix resins and hardeners using pneumatic dispensers. Maintain 1:1 ratio through automated mixing tips.
5. Gunning & Dispensing Mastery
- Pressure Control: Set pneumatic guns to 60–80 psi for smooth flow. Test on cardboard to establish consistent trigger speed.
- Bead Geometry: Apply convex beads (1.5x joint width) to allow for shrinkage. Maintain 45° gun angle to reduce air entrapment.
6. Hand Finishing & Smoothing
- Tooling: Use concave spatulas to shape beads within 10 minutes of application. Feather edges to create gradient transitions.
- Solvent Wiping: Remove excess sealant with mineral spirits on lint-free cloths. Avoid over-wiping to prevent solvent-induced porosity.
7. Special Condition Solutions
- Expansion Joints: Install sliding clips to decouple panels from adjacent structures. Fill gaps with self-leveling sealants.
- Penetrations: Seal pipe/conduit entries with preformed boots bonded to panels using epoxy primers.
8. Thermal Movement Accommodation
- Flexible Joints: Design segmented joints with 2mm gaps between sealant segments to allow ±25% movement.
- Stress Relief: Drill 6mm holes at joint intersections to prevent sealant tearing during thermal cycling.
9. Defect Prevention Strategies
- Bubble Elimination: Pre-warm cartridges to 20°C and use dehumidifiers to maintain RH <60%.
- Clog Avoidance: Clean gun nozzles with wire brushes after each use. Replace worn tips immediately.
10. Quality Assurance Protocols
- Dimensional Checks: Use digital calipers to verify bead width/depth compliance. Reject dimensions outside ±0.5mm tolerance.
- Adhesion Testing: Perform pull-off tests using 50mm dollies at 48-hour intervals. Require ≥0.8MPa bond strength.

11. Environmental Adaptations
- Temperature Adjustments: Below 10°C, pre-heat panels to 15°C using infrared lamps. Above 35°C, work early mornings to avoid premature skinning.
- Rain Protection: Erect temporary canopies for 48-hour curing periods. Use moisture meters to verify surface dryness before re-working.
12. Repair & Maintenance
- Surface Prep: Remove failed sealants with plastic scrapers. Grind residual adhesive with diamond-cup wheels.
- Patching: Apply new sealant in layered passes, allowing 6-hour intervals between coats. Overfill joints by 1mm to compensate for shrinkage.
Common Issues & Solutions in Aluminum Panel Sealing
1. Uneven Adhesive Layers & Leakage
Root Causes:
- Application Speed: Excessive speed creates air pockets; overly slow work allows premature skinning.
- Tooling Issues: Worn nozzles produce inconsistent beads; improper gun pressure causes surging.
- Environmental Factors: Wind gusts disrupt bead profiles; direct sunlight accelerates skin formation.
Solutions:
- Technique Adjustments: Train crews to maintain 30–40cm/min application speed. Use pressure regulators set to 70psi for consistent flow.
- Tool Maintenance: Replace nozzles every 500 linear meters or when wear exceeds 0.2mm. Clean guns daily with solvent-resistant brushes.
- Environmental Controls: Erect windbreaks and shade canopies. Schedule work during off-peak wind hours (early mornings).
Remediation:
- For minor gaps, inject sealant using syringe applicators. For widespread issues, remove failed sections with heat guns and re-apply in layered passes.
2. Sealant Aging & Failure
Contributors:
- Poor Curing: Low temperatures (<5°C) inhibit polymerization; excessive moisture causes bubbling.
- UV Degradation: Clear sealants without UV inhibitors crack after 2–3 years in sunny regions.
- Dirt Accumulation: Organic growth on sealants promotes acid formation, accelerating breakdown.
Preventive Measures:
- Curing Protocols: Use infrared thermometers to verify surface temps ≥10°C before application. Install dehumidifiers in enclosed spaces.
- Material Selection: Specify pigmented sealants with ≥5% UV stabilizers. For coastal areas, add corrosion inhibitors.
- Cleaning Schedules: Pressure-wash joints annually using mild detergents. Avoid abrasive cleaners that scratch aluminum surfaces.
3. Environmental & Operational Errors
Critical Factors:
- Humidity: RH >75% causes blooming (white residue) in silicone sealants.
- Temperature Shocks: Sudden 20°C+ drops during curing create internal stresses.
- Skill Gaps: Improper joint preparation (e.g., contaminated surfaces) reduces adhesion by 40%.
Mitigation Strategies:
- Climate Monitoring: Use hygrometers to track RH levels. Postpone work when conditions exceed spec limits.
- Surface Prep: Abrade aluminum with 120-grit pads to achieve 25μm anchor profile. Wipe with IPA to remove oils.
- Training Programs: Conduct quarterly workshops on joint geometry, material compatibility, and safety protocols. Certify crews through hands-on assessments.
4. Density Enhancement Techniques
- Backer Rod Selection: Use closed-cell polyethylene rods with ≥30kg/m³ density to prevent compression set.
- Layered Application: Apply initial 50% joint depth, allow 2-hour cure, then fill remaining depth. Increases final density by 12–15%.
- Vacuum Consolidation: For critical joints, use handheld vacuum pumps to remove entrained air post-application.
5. Quality Control Framework
- Real-Time Monitoring: Deploy digital thickness gauges for 10% random checks. Use endoscope cameras for hidden joint inspections.
- Document Tracking: Maintain batch records for sealants and backer rods. Cross-reference with performance data.
- Warranty Programs: Offer 5-year guarantees with annual inspections. Include clauses for geographic-specific UV exposure adjustments.
Quality Inspection & Acceptance Criteria for Aluminum Panel Sealing

1. Key Quality Metrics
- Adhesive Joint Dimensions:
- Width: Uniformity ±0.5mm (measured via digital crack meters at 50cm intervals).
- Depth: Minimum 50% of joint volume filled (verified using ultrasonic thickness gauges).
- Density: ≥1.3g/cm³ for high-performance silicones (tested via water displacement method).
- Bond Strength: ≥1.2MPa in peel tests (ASTM C794) after 28-day cure.
- Surface Finish: Smoothness ≤0.2mm deviation (checked with profile gauges).
2. Testing Protocols
A. Dimensional Compliance:
- Width/Depth Checks:
- Use for 1% of joints: Slice sealed sections, measure dimensions under microscope.
- Compare against CAD models for tolerance stacking analysis.
- Density Testing:
- Extract 30mm samples using core drills. Weigh in air/water to calculate specific gravity.
B. Water/Weather Resistance:
- Static Pressure Test: Apply 500Pa water pressure for 72h (EN 1027).
- Wind-Driven Rain Simulation: Use calibrated nozzles to replicate 100mm/h rainfall at 45° angles.
- Dye Penetration Method: Inject rhodamine dye into joints; UV inspection reveals leaks <0.1mm.
3. Acceptance Standards
- National Codes:
- China GB/T 21086: Requires ≥0.8MPa bond strength for structural glazing.
- US AAMA 501.1: Mandates 72-hour cure before weather testing.
- Industry Benchmarks:
- LEED v4: Demands third-party verification of air/water barrier continuity.
- ASTM E2112: Specifies <5% moisture absorption after 30-day immersion.
4. Inspection Regimen
- Self-Inspection:
- Daily checklist for 100% joints: Visual checks + 5% destructive samples.
- Use smartphone apps to geo-tag defects and auto-generate repair tickets.
- Third-Party Audits:
- Pre-shipment: Radiographic inspection of 2% joints for voids.
- Post-installation: Infrared thermography to detect thermal bridging.
5. Documentation & Feedback Loop
- Digital Recordkeeping:
- Upload test data, photos, and weather logs to cloud platforms with timestamp verification.
- Generate QR-coded compliance certificates for each facade segment.
- Corrective Action:
- Establish “red-tag” system for critical failures. Retrain crews if defect rates exceed 3%.
- Optimize density through nozzle redesign: Reduce orifice diameter by 0.2mm to increase extrusion pressure.
6. Density Enhancement Strategies
- Material Selection: Use two-component polysulfides with 85% solids content.
- Application Technique: Apply in 3mm increments with 15-minute intervals for better compaction.
- Curing Environment: Maintain 23±2°C and 50±5% RH during critical first 48 hours.
Maintenance & Preservation Guidelines for Aluminum Panel Sealing Systems
1. Routine Care Recommendations
- Density Monitoring:
- Use Shore A durometers to check sealant hardness quarterly. Readings >40 indicate potential density loss.
- Compare initial density records (post-installation) with annual measurements to track degradation.
- Cleaning Protocol:
- Avoid abrasive cleaners; opt for pH-neutral solutions (e.g., 5% vinegar/water mix).
- Pressure wash at ≤2000psi with fan nozzles to prevent sealant erosion.
2. Scheduled Inspection Regime
- Visual Checks:
- Inspect 10% of joints monthly for cracks, discoloration, or shrinkage. Prioritize south-facing facades.
- Density Testing:
- Deploy ultrasonic pulse velocity (UPV) testers annually to assess in-situ density. Drops >10% from baseline warrant repair.
- Environmental Adjustments:
- In coastal areas with salt spray, shorten inspection intervals by 40%.
3. Early Intervention Strategies
- Density Restoration:
- For localized density loss, inject high-modulus silicone (1.5g/cm³) via syringe ports drilled every 20cm.
- Use infrared cameras to identify thermal anomalies indicating voids.
- Surface Repairs:
- Apply UV-resistant topcoats to prevent photo-oxidation of sealants.

4. Repair & Replacement Protocols
A. Partial Repairs:
- Step 1: V-groove removal of failed sealant using oscillating blades.
- Step 2: Clean joints with isopropyl alcohol; apply primer if surface energy <38mN/m.
- Step 3: Install backer rods with 2mm compression; fill joints in 5mm lifts.
- Density Assurance: Use nuclear densometers to verify ≥1.3g/cm³ in repaired areas.
B. Full System Overhaul:
- Trigger Points:
- Widespread density <1.2g/cm³ (tested via core sampling).
- Joint displacement exceeding 25% of original width.
- Process:
- Remove all sealant using heat guns (max 150°C) and solvent-resistant scrapers.
- Replace corroded aluminum substrates prior to re-sealing.
5. Long-Term Preservation Planning
- Density-Based Lifecycles:
- High-density systems (1.4+g/cm³): 15-20 years with proper care.
- Medium-density (1.2-1.4g/cm³): 10-12 years in moderate climates.
- Climate Adaptation:
- In freeze-thaw zones, specify sealants with ≥300% elongation.
- For desert environments, use ceramic-reinforced formulations to resist thermal shock.
6. Proactive Density Management
- Preventive Coatings: Apply sacrificial epoxy layers to shield sealants from UV.
- Dynamic Testing: Conduct annual peel tests on 1% of joints to predict density trends.
- Training: Certify maintenance crews in ASTM D3930 density assessment techniques.
By integrating density metrics into maintenance workflows, building owners can extend system lifespans by 30-50% compared to calendar-based replacement schedules. Regular data logging enables predictive modeling, ensuring interventions occur during the “sweet spot” between cost-effectiveness and performance risk.