1. Introduction: What is an aluminum curtain wall system?
Definition and Function
An aluminum curtain wall system is a non-structural exterior cladding for buildings, typically composed of lightweight aluminum frames and infill materials (such as glass, metal panels, or stone facades). Unlike load-bearing walls, curtain walls do not bear the structural loads of a building; instead, they are anchored to floor slabs or structural frames and are designed to resist air and water penetration, wind pressure, and seismic forces.
Key functions include:
- Providing weather-resistant building envelope protection
- Enhancing aesthetic appeal and natural lighting
- Improving thermal and acoustic performance
- Supporting sustainable energy-efficient design
Types of Aluminum Curtain Wall Systems
There are two primary types of aluminum curtain wall systems, each with distinct installation methods:
Unitized Curtain Wall System
- Pre-assembled panels (including frames, glass, seals, and insulation materials) are manufactured in a factory and transported to the construction site.
- Due to faster on-site installation and better quality control, they are an ideal choice for high-rise buildings.
- Cranes or hoists are required for panel installation.
Frame-type curtain wall systems
- Components (vertical frames, horizontal beams, glass windows) are transported separately and assembled on-site.
- Suitable for mid-to-low-rise projects or irregular facades.
- Lower material costs, but longer installation time due to on-site assembly.
Application Scenarios and Reasons
Aluminum curtain wall systems are primarily used in modern commercial and institutional buildings for the following reasons:
- High-rise buildings: A lightweight, durable enclosure solution capable of accommodating large spans of glass while withstanding wind loads.
- Corporate office buildings: A stylish, professional aesthetic appearance and energy-efficient glass window options.
- Hospitals, universities, government buildings: Improved thermal performance, natural daylighting, and compliance with energy regulations.
- Retail and complexes: Customizable designs that support brand promotion and attract pedestrians.
Its widespread application stems from its balance between performance, design flexibility, and long-term durability across different climates and regions.
II. Pre-Installation Considerations
Thorough planning and coordination are critical before installing any aluminum curtain wall system. Mistakes during this phase may result in costly rework, project delays, or system failures. The following are key pre-installation tasks that must be completed for each project.
1. Site Inspection and Building Layout
A detailed inspection of the construction site is the critical first step. Installers and project managers must verify:
- Accuracy of structural panel edges and embedded positions
- Accessibility of cranes or lifts, especially for unitized systems
- Cleanliness and safety of storage areas for aluminum frames and glass units
- Any discrepancies between architectural drawings and the as-built condition
Building layout lines for each floor must be accurately marked to determine reference points for vertical frame positioning and anchor alignment.
2. Structural and Wind Load Calculations
Curtain wall systems must be capable of withstanding the following environmental forces:
- Wind pressure (positive and negative loads, depending on building height and region)
- Seismic loads (especially in earthquake-prone areas)
- Dead loads (weight of glass and frame components)
- Live loads (from building displacement, thermal expansion, and sway)
Engineers must calculate deflection limits, anchor tensile strength, and verify compatibility between the curtain wall frame and structural support. Neglecting load calculations may result in structural failure, water leakage, or glass breakage.
3. Curtain wall design drawings and material submissions
All curtain wall systems require construction drawings tailored to the specific project, which must be approved by the architect, structural engineer, and general contractor. These include:
- Elevation drawings showing vertical frame spacing and panel layout
- Detailed information on connections, anchoring, gaskets, and drainage paths
- Glass dimensions, coatings, and thermal performance specifications
- Verified dimensions for cutting lengths used in unitized panel manufacturing or for panel systems
Material submissions (aluminum profiles, sealants, glass specifications, fasteners) should be submitted alongside the drawings for review and approval prior to manufacturing.
4. Coordination with Other Trades
Effective curtain wall installation requires early and frequent coordination with other trades, particularly noting the following:
- Structural steel contractor: Ensure that embedded anchors and steel components are properly aligned and allow for anchoring
- Mechanical, electrical, and plumbing (MEP) trades: Avoid conflicts with HVAC ductwork, fireproofing materials, and electrical conduits at floor edges or exterior wall penetrations
- Interior finishing team: Curtain wall anchors and frames may affect exposed gypsum board sections or ceiling interfaces
- Waterproofing and Roofing Contractors: Curtain wall transitions must be integrated with air/vapor barrier membranes and roof terminations
Poor coordination may result in component conflicts, leaks, or delays in exterior wall connections.
III. Required Tools and Equipment
The successful installation of an aluminum curtain wall system depends not only on precise planning but also on having the appropriate tools and equipment—to ensure safety and performance. The following is a classification of basic equipment required on-site.
1. Lifting and Maintenance Equipment
Curtain wall panels, especially unitized curtain wall systems, are large, heavy, and typically installed at high elevations. The following equipment is commonly used:
- Tower crane/mobile crane – for lifting unit panels or large vertical frames
- Material hoists/rotating platforms/mast climbers – used for maintenance during the installation of pole-mounted systems
- Scaffolding and aerial work platforms (AWP) – scissor lifts or boom lifts for mid-rise buildings and indoor operations
- Glass vacuum suction cups – suction cup tools for safely handling large insulated glass units (IGU)

2. Alignment and Layout Tools
Precise positioning of anchor bolts and vertical frames is critical. Early alignment errors can compromise the entire system. Tools include:
- Laser level – for horizontal and vertical layout lines
- Plumb line and chalk line – traditional tools for straight reference points
- Theodolite or total station – for high-rise projects requiring precise verticality and alignment
- Tape measure and folding ruler – for manual checks and on-site verification
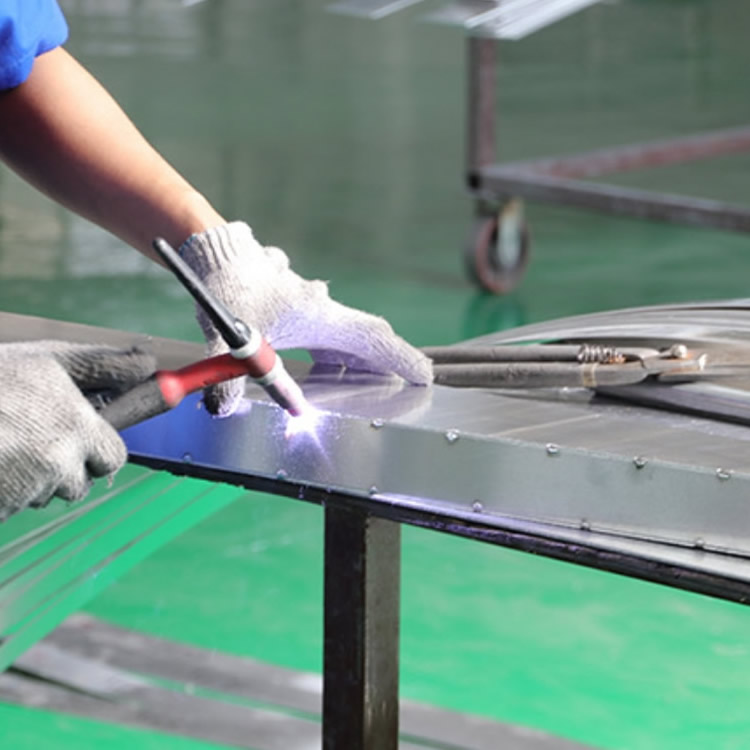
3. Power Tools and Manual Tools
Frame and anchor assembly requires heavy-duty and precision tools:
- Cordless impact driver/drill – for fastener installation and bracket mounting
- Screwdriver – for repeated aluminum-to-aluminum connections
- Angle grinder – for on-site trimming or modifying aluminum profiles
- Riveting gun/structural blind rivet tool – for aluminum frame connections
- Caulking gun (manual or pneumatic) – for applying weatherproof sealant
4. Sealant and gasket installation tools
Glass systems heavily rely on seals to ensure airtightness and waterproofing. Common tools:
- Support rod insertion roller – for pressing foam rods into joints
- Sealant nozzle (with shaping tool) – For evenly applying sealant
- Rubber scraper and scraper – For applying silicone sealant
- Lint-free cloth and solvent – For surface preparation before sealing
5. Safety equipment (personal protective equipment and site safety)
Curtain wall construction often involves working at heights and handling sharp glass and metal:
- Fall protection system – safety harnesses, lifelines, edge protection devices
- Safety helmets, gloves, safety boots, high-visibility vests
- Safety goggles and hearing protection – especially during cutting or drilling
- Fire extinguishers and first aid kits – particularly important during on-site welding or grinding
- Emergency lifting and evacuation plans – applicable in high-rise building environments
6. Curtain wall-specific tools (optional but recommended)
- Torque wrench – to ensure anchor bolts meet specification requirements
- Drainage test kit – to test the built-in drainage system of the curtain wall’s vertical frames
- Digital thickness gauge – to verify anodized or coated aluminum facades
- Glass edge protection devices and corner guards – to prevent breakage during handling
Having these tools ready and verified before installing the first panel can significantly increase installation speed, minimize rework, and ensure the curtain wall is waterproof and compliant with specifications.
IV. Step-by-Step Installation Process
Installing an aluminum curtain wall system (whether unitized or framed) requires strict adherence to installation sequence, tolerances, and waterproofing principles. The following is the detailed step-by-step process used by professional curtain wall contractors on-site.
1. Layout and Anchoring
Objective: Determine the structural connection points of the curtain wall frame.
- Grid line verification: Use a laser level and total station to transfer layout control lines from the structural slab to the anchor brackets or embedded plates.
- Anchor bolt positioning: Install mechanical anchor bolts or welded plates along the edge of the floor slab or columns. Anchor bolts must be vertically aligned on the floor slab to support the continuity of the vertical frames.
- Bracket Leveling: Use shims and leveling devices to adjust floor slab irregularities and ensure precise vertical frame positioning.
- Torque Testing: Bolts are tightened to specification and typically tested using a calibrated torque wrench to ensure compliance.
Note: Any misalignment at this stage will be amplified on higher floors—carefully inspect each anchor line and offset before proceeding.
2. Frame Installation
Objective: Assemble the aluminum skeleton of the curtain wall system.
- Vertical Frames: Lift into position and connect to anchor bolt brackets. Joints between vertical frames (at floor levels) typically use expansion joints to accommodate thermal or seismic displacement.
- Horizontal beams: Installed between vertical beams using shear blocks or mechanical fasteners. They must be flush-aligned to ensure the correct geometry of the glass channels.
- Insulation strips and seals: Installed within the vertical frames prior to filling; critical for thermal insulation and air control.
- Water management integration: Internal drainage pipes and drainage holes must be unobstructed and aligned to ensure water flows outward.
Tip: Be sure to use pre-applied or field-applied sealing tape to ensure waterproof connections at the intersections of horizontal and vertical frames.
3. Panel or Glass Unit Installation
Objective: Install the filling material (typically insulated glass units (IGUs) or aluminum panels) into the completed frame.
- Cleaning and Preparation: All frame channels and glass surfaces must be cleaned with an approved solvent to avoid contamination beneath gaskets or sealants.
- Inserting the Filling Unit: Use a vacuum lift to lift the insulated glass unit (IGU) and place it into the glass slot. Place spacers to maintain glass spacing and properly distribute the load.
- Centering and Alignment: Check that the edge gaps on all four sides of the glass and frame are uniform.
- Gasket Compression: Install EPDM gaskets or pressure plates to press the glass tightly against the frame, ensuring airtightness/watertightness.
Bar system notes: The filling layer is typically glazed from the exterior; unit panels are typically glazed at the factory and installed as a whole.
4. Sealing and waterproofing
Objective: Seal all joints and transition layers to ensure long-term waterproofing and moisture resistance.
- Internal airtightness: Insert backing strips and apply airtight sealant on the warmer side of the wall.
- External weatherproof sealing: Apply silicone or mixed sealant to panel joints, vertical frame interfaces, and perimeter transition layers.
- Flashings and transition layers: The curtain wall system must be connected to the roof, window, and floor edge waterproofing systems and wrapped with metal flashing plates or membranes.
- Drainage system testing: Pour tests or hose tests can verify the proper functioning of the internal drainage system.
Common failure points: Improper use of sealant or skipping the perimeter transition layer often leads to water leakage during storms or inclement weather.
Optional steps: Install pressure plates and cover plates
In the pressure glass system, extruded aluminum pressure plates are bolted to the gaskets, followed by the installation of snap-on cover plates to achieve an aesthetic and UV-resistant effect.
Ensure that bolt torque is uniform to prevent plate bending or uneven gasket compression.
Final inspection checklist
- All fasteners are tightened to specification
- Vertical frames and panel joints are fully sealed
- Gasket is properly installed, and corners are correctly joined
- Glass surfaces are clean, with no scratches or residues
- Waterproofing test passed
- Completion photos and installation documentation are recorded
5. Quality Control and Inspection
After the aluminum curtain wall system is installed, a comprehensive quality control (QC) and inspection process is critical to ensure its long-term performance, compliance with specifications, and warranty conditions. This stage verifies that all components are correctly installed and operate as designed under environmental conditions.
1. Alignment and Tolerance Inspection
Objective: Ensure the curtain wall system is structurally aligned and visually consistent.
- Vertical and horizontal verification: Use a laser level or total station to confirm that vertical frames are properly aligned and horizontal beams remain level across multiple bays.
- Joint spacing and openings: Inspect the uniformity of panel gaps, glass-to-frame gaps, and pressure plate openings.
- System tolerances: Confirm that all critical dimensions are within acceptable tolerances—typically ±2 mm for joint alignment and ±3 mm for panel offset.
2. Structural Fastening and Anchoring Inspection
Objective: Verify that all mechanical connections meet structural performance standards.
- Anchor Bolt Torque: Re-inspect randomly selected bolts using a calibrated torque wrench.
- Weld Inspection (if applicable): Conduct a visual inspection or penetrant testing of field welds, particularly around steel embedded plates.
- Joint Connections: Inspect expansion joints and vertical frame joints for proper gaps and clamping components.
3. Glass and Sealant Inspection
Objective: Ensure the weatherproofing system is intact and undamaged.
- Gasket Fit and Compression: Confirm that EPDM gaskets are fully secured with no visible bending, twisting, or gaps.
- Sealant Continuity: Visually inspect all silicone or mixed sealant strips for gaps, bubbles, or poor sealing.
- Corner Transitions: Pay particular attention to corner joints, vertical/horizontal transitions, and interfaces with other materials (e.g., stone, exterior insulation and finish system (EIFS), roof).
4. Air and Water Penetration Testing
Objective: To demonstrate that the curtain wall functions properly under pressure.
- ASTM E1105 Water Penetration Test: Simulates rainfall + internal negative pressure; the system should show zero leakage.
- ASTM E783 Air Leakage Test: Measures air flow in the system under pressure differential.
- Indoor Model Testing (optional but recommended for large/high-value projects): Conducted on a full-scale sample wall prior to installation.
5. Aesthetic and Finish Inspection
Objective: Ensure the final product meets building standards and owner expectations.
- Coating and Finish Consistency: Inspect aluminum anodizing or powder coating for uniform color, gloss, and thickness.
- Glass Quality: Inspect panels for chips, scratches, or color inconsistencies.
- Cover Plate Uniformity: Snap-on cover plates or vertical frame cover plates must be securely fastened, flat, and aligned.
6. Documentation and Sign-off
Objective: Create a complete record of installation compliance and approval.
- Inspection report: Includes annotated photos, test results, and site records.
- As-built drawings: Reflect final dimensions, anchor locations, and any site modifications.
- Manufacturer warranty activation: Submit all required documents to activate glass, aluminum, or sealant warranties.
- Defect list completion: Conduct a final inspection with the general contractor, architect, or curtain wall consultant to address minor issues or aesthetic concerns.
Proper quality control not only prevents future failures but also protects the building envelope from long-term damage caused by water penetration, thermal cycling, or wind-induced fatigue.
VI. Common Mistakes to Avoid in Curtain Wall Installation
Even experienced installers may make costly mistakes if they do not follow the correct procedures and sequence. The following lists the most common errors encountered during aluminum curtain wall installation and how to avoid them.
1. Misaligned Anchor Bolts or Vertical Frames
Issue: Even a few millimeters of deviation in the position of the anchor bolts can cause the vertical frames to misalign, resulting in the entire compartment shifting or panels deforming.
Solution:
- Use a laser level or total station to carefully check the layout.
- Pre-mark the anchor bolt positions before drilling.
- Install the first vertical frame as a reference.
2. Improper application of sealant
Issue: Gaps, voids, or inconsistent sealant strips can cause water leakage and fail airtightness tests.
Solution:
- Use support rods to control joint depth.
- Immediately tool the sealant after application.
- Clean with approved solvents to avoid surface contamination.
3. Improperly secured gaskets
Issue: Twisted or uncompressed gaskets cannot form a waterproof seal.
Solutions:
- Visually inspect gaskets during installation.
- Use silicone lubricant to guide installation if necessary.
- Apply even pressure and check for rebound gaps.
4. Poor drainage design or blocked drainage holes
Issue: Blocked or missing drainage holes can cause water to accumulate within the frame system, leading to corrosion or leaks.
Solutions:
- Ensure internal drainage pathways are clear.
- Inspect drainage holes during quality control.
- Do not allow sealant or debris to block openings.
5. Damaged panel or glass edges
Issue: Improper handling during transportation or lifting can cause edge chipping or cracking, especially in insulated glass units (IGUs).
Solution:
- Always use suction cups and corner protectors.
- Store equipment vertically with padding.
- Train workers to handle glass properly.
6. Neglecting thermal joints and displacement joints
Issue: Curtain wall components may deform under thermal loads or seismic displacement if proper expansion gaps are not provided.
Solutions:
- Install expansion joints at each floor level or as specified on vertical frames.
- Do not skip or compress horizontal expansion spacers.
- Consider system tolerances at corners and floor edges.
7. Lack of coordination with other trades
Issue: Curtain wall components conflict with MEP systems, floor waterproofing layers, or ceiling finishes.
Solution:
- Hold coordination meetings during the pre-installation phase.
- Share construction drawings with all stakeholders as early as possible.
- Provide on-site access for other trades as needed.
Avoiding these issues requires not only technical skills but also effective communication between engineering, manufacturing, and on-site staff. Minor errors in the early stages can lead to millions of dollars in rework or water damage losses later on.
7. Maintenance Recommendations
Although aluminum curtain wall systems are designed for durability and minimal maintenance costs, regular maintenance is crucial for extending system lifespan, ensuring energy performance, and preventing long-term water stains or structural damage. The following is a practical maintenance guide tailored for building owners, facility managers, and maintenance teams.
1. Daily Cleaning
Frequency: Twice a year, with more frequent cleaning recommended for coastal areas or regions with high pollution levels.
- Glass Panels: Use non-abrasive cleaners and soft cloths or rubber brooms. Avoid products containing ammonia, which may damage coatings.
- Aluminum Frames: Clean anodized or painted surfaces with mild cleaners and water. Rinse thoroughly to prevent streaking.
- Covers and Gaskets: Wipe during glass cleaning to prevent dirt or mold buildup.
Tip: Use deionized water for the final rinse to ensure a streak-free finish on high-visibility exterior walls.
2. Gasket and Sealant Inspection
Frequency: Annually
- EPDM gaskets: Inspect for shrinkage, peeling, or cracking, especially at corners or joints.
- Silicone Sealant: Inspect for discoloration, reduced adhesion, or cracking. UV exposure and thermal cycling can cause sealant performance to degrade over time.
- Perimeter Seams: These areas are most susceptible to building movement and require special attention.
Measures: Replace or rework damaged gaskets and reapply sealant as needed, following the manufacturer’s compatibility guidelines.
3. Water Leakage and Drainage Inspection
Frequency: After storms or every six months
- Internal water leakage signs: Inspect curtain wall connections for water stains, peeling paint, or mold spots.
- Drainage holes: Ensure internal drainage paths and holes are unobstructed and free from sealant, paint, or debris blockages.
- Sloped window sills and flashing: Verify proper slope and integrity of waterproof membrane seals.
Tip: Conduct a hose test in suspicious areas or after replacing sealant to confirm waterproofing effectiveness.

4. Structural Integrity Monitoring
Frequency: Every 3–5 years or after seismic activity
- Anchors and brackets: Confirm that connection points show no signs of corrosion, loosening, or fatigue.
- Vertical frame joints: Ensure that movable joints remain functional and are not blocked or jammed.
- Panel alignment: Inspect panels for bending, shifting, or separation, especially on higher floors subjected to wind loads.
Optional: Engage a curtain wall consultant for exterior wall safety inspections of high-rise buildings (e.g., New York City’s FISP requirements).
5. Recoating and Surface Repair
Frequency: As needed (typically every 10–15 years)
- Powder-coated frames: Minor scratches can be repaired using a touch-up kit; severe wear may require recoating.
- Anodized aluminum: Avoid using abrasive cleaners—for fading or pitting, use a repair paste or professional touch-up agent.
6. Documentation and Record Keeping
For warranty purposes, be sure to use cleaners and materials approved by the original system manufacturer.
A log should be maintained for each inspection, recording the date, observed conditions, repairs performed, and materials used.
Archive original construction drawings and submitted materials for reference during any repair or renovation work.